This article will explain how to print picking lists automatically from PrestaShop.
This solution requires you to download and install Automatic Email Manager software for Windows and our Picking List PrestaShop module.
The Automatic Email Manager software monitors your e-mailbox and automatically detects new emails then applies the defined actions such as printing the attached picking list PDF document.
The Picking List module can be downloaded from our PrestaShop Modules Store. Click here to download.
Here are the steps required to automatically print picking lists from PrestaShop:
- Install Automatic Email Manager software for Windows.
- Install Picking List PrestaShop module.
- You should have your printer configured in Windows and have the details of your Pop3 email account available. This is the email address you will be sending new order notifications to.
- Connect your POP3 email in Automatic Email Manager. See steps and screenshots below:
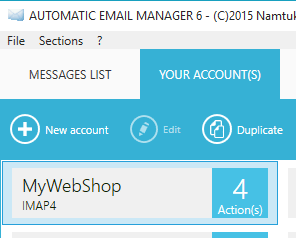
4.1 Click on ‘Your accounts’, then ‘New’

4.2 Enter your email
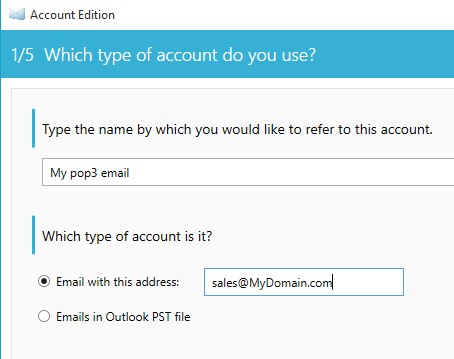
4.3 Choose the email type POP3
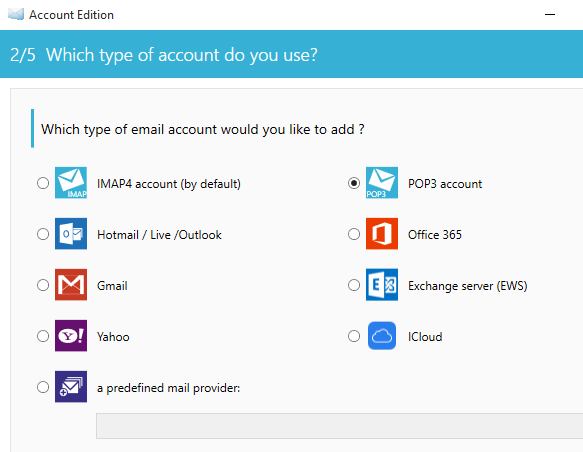
4.4 Just enter your email server address, login and password

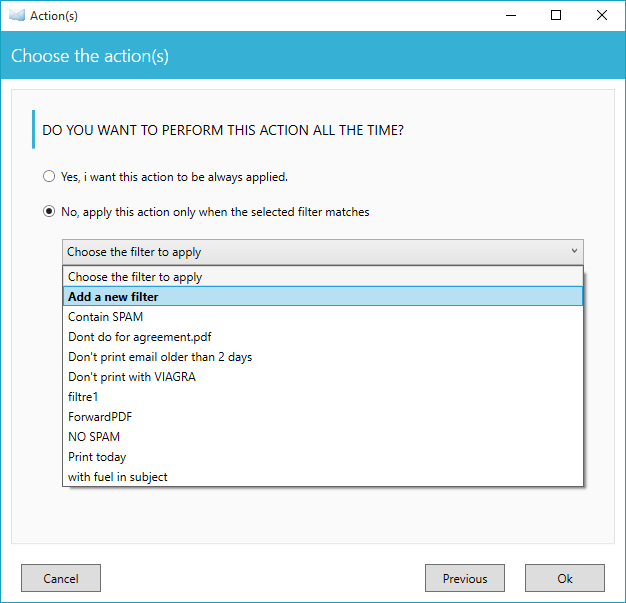
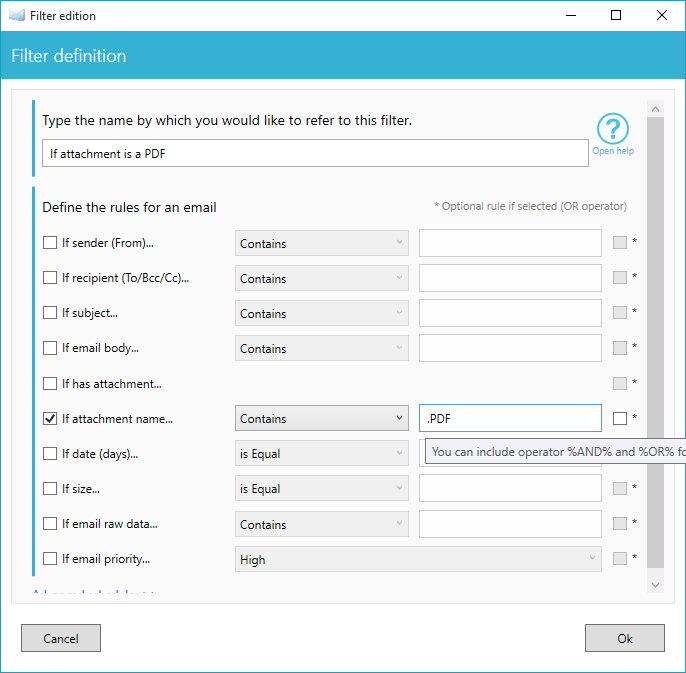
5. In Automatic Email Manager add a new rule to print attachments. See steps and screenshots below:
5.1 Edit your email account, then move to the list of Actions
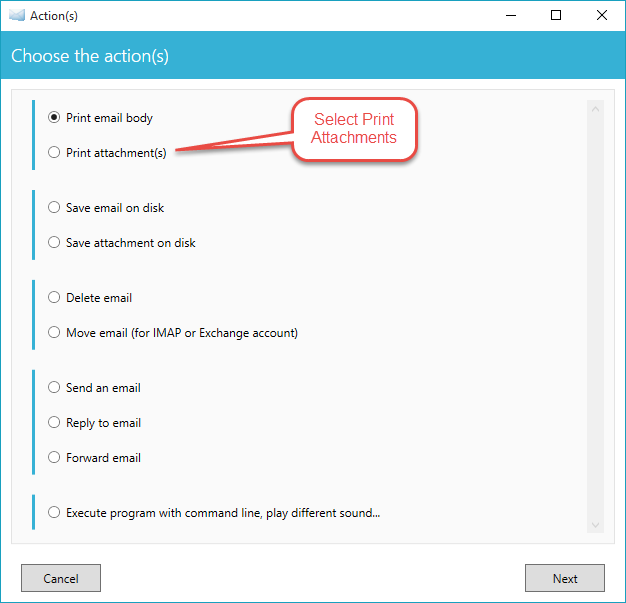
5.2 Add a new action like ‘Print attachments’, and click on next button
5.3 Now you add a new filter and define to do this action when the filter matches
6. Go to the configuration page of the Picking List module. Enable ‘Enable picking list alert’ and enter the email recipient email address. 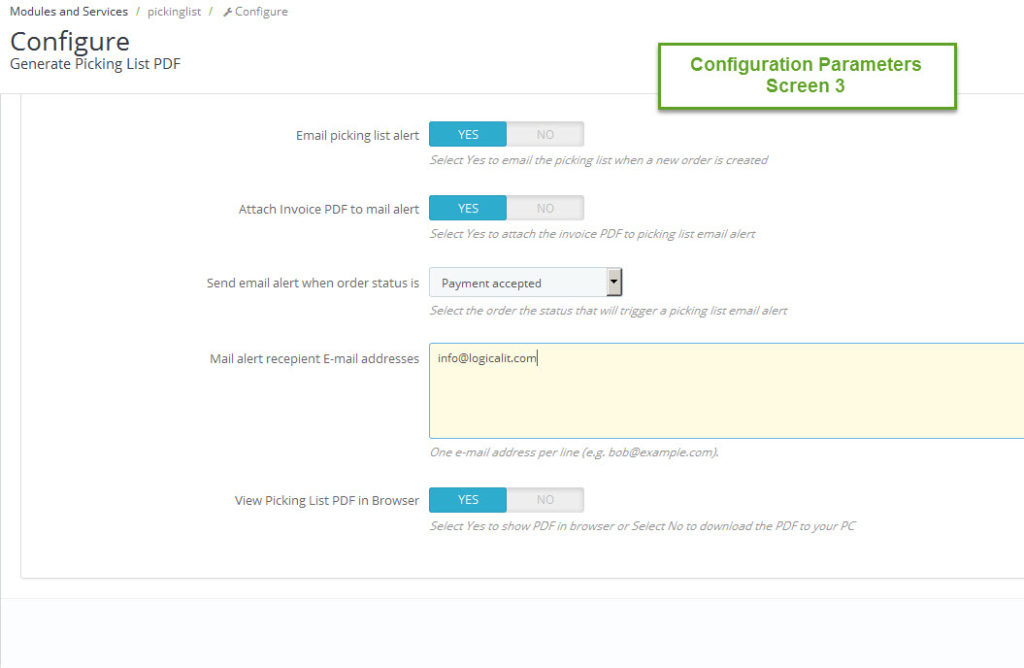
Click here for Automatic Email Manager Software help and tutorials.
Click here if you want to use Google’s cloud printer service with Automatic Email Manager.